

In this graphic design tutorial, we are going to be making a dynamic
digital creation using a combination of stock photos, textures and
brushes. We will also incorporate blend mode techniques, coloring
effects, and some cool light effects as well. If you are ready to get
started, then grab some coffee (or your favorite caffeinated drink) and
let’s get to it!
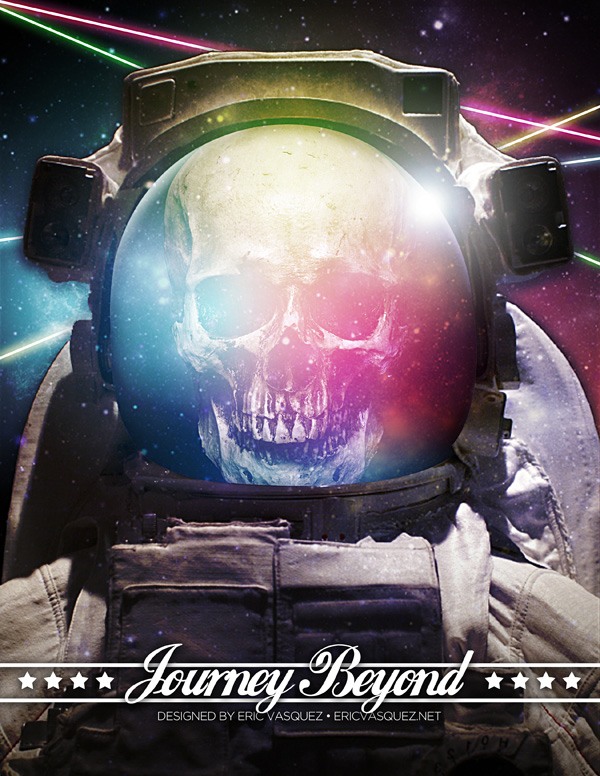
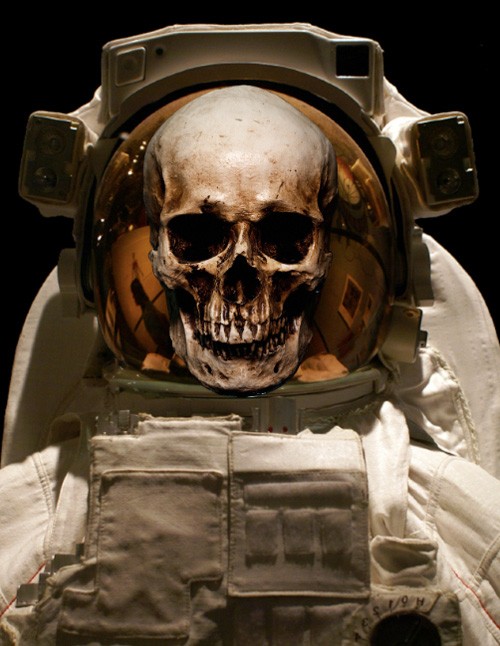
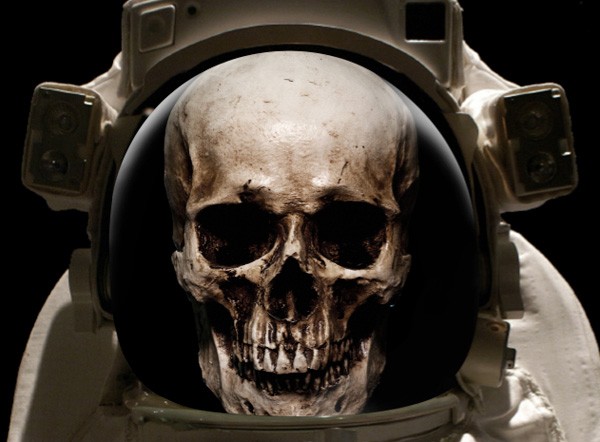
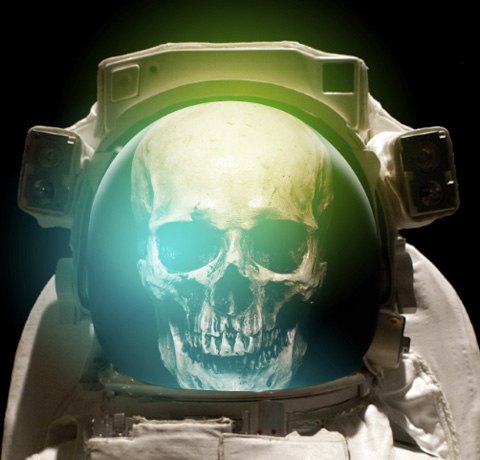
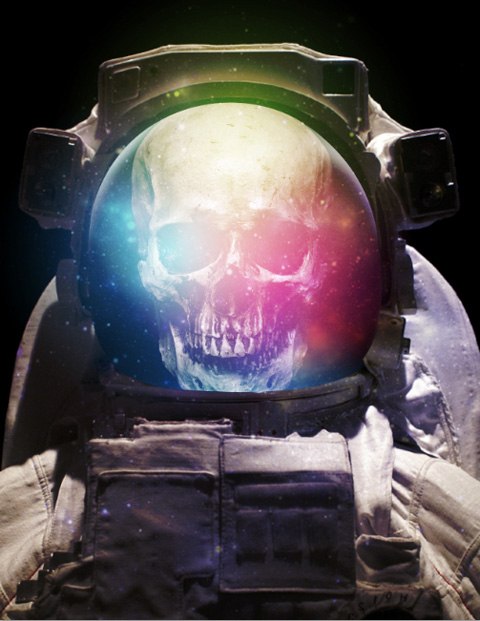
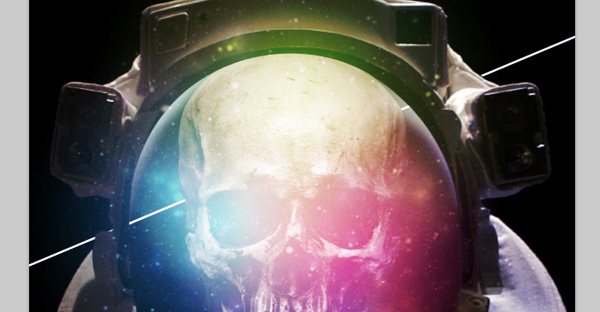
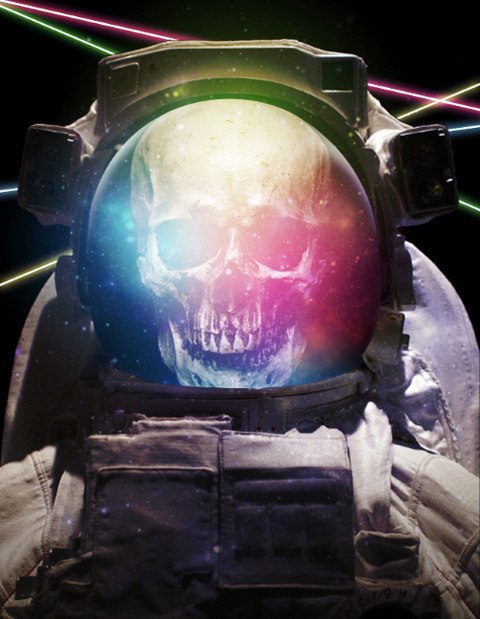
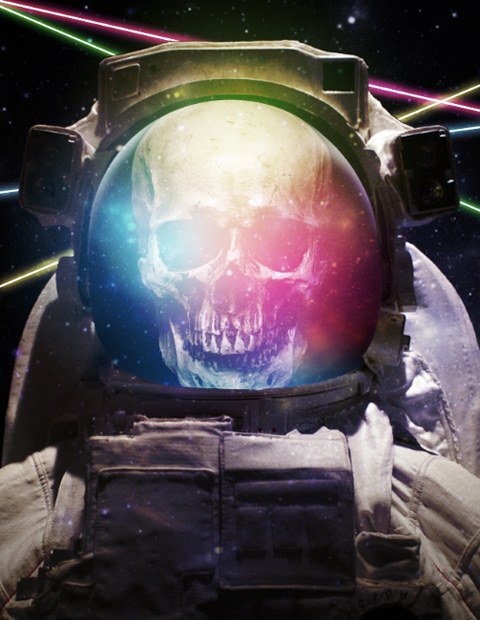
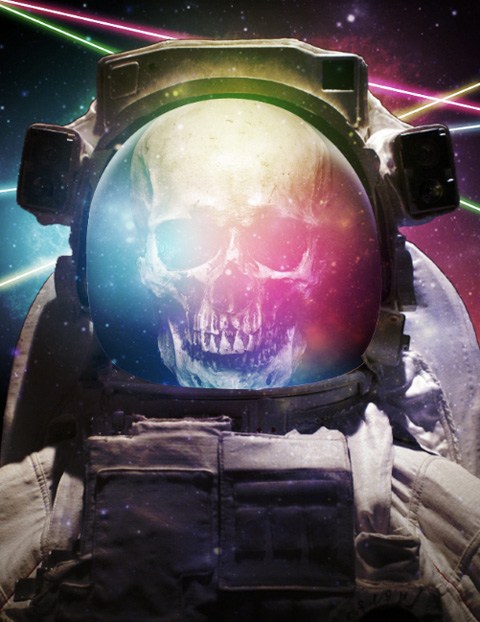
Preview
Tutorial Resources
- Skull from iStockphoto
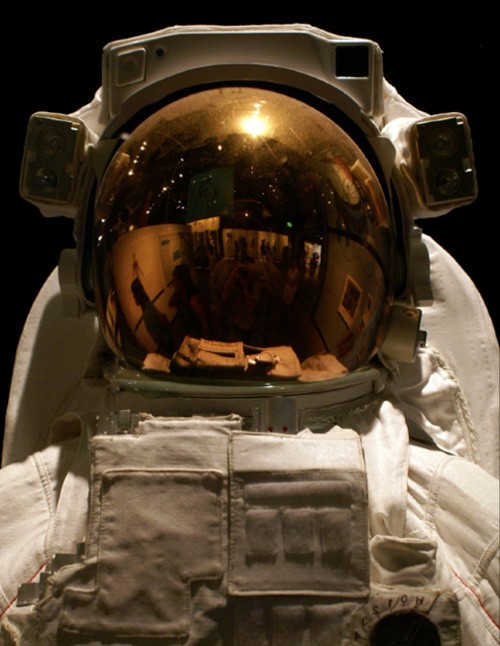
- Spacesuit Close-Up from iStockphoto
- Blue Space Nebula from iStockphoto
- Nasa Space Brushes from Brusheezy
Step 1: Isolating the Skull
Start up Photoshop and open up the Skull image. Zoom in closely to the image and, with your Pen Tool (P), begin to trace around the skull, following its shape. We want to create a path that will allow us to remove the background from the image.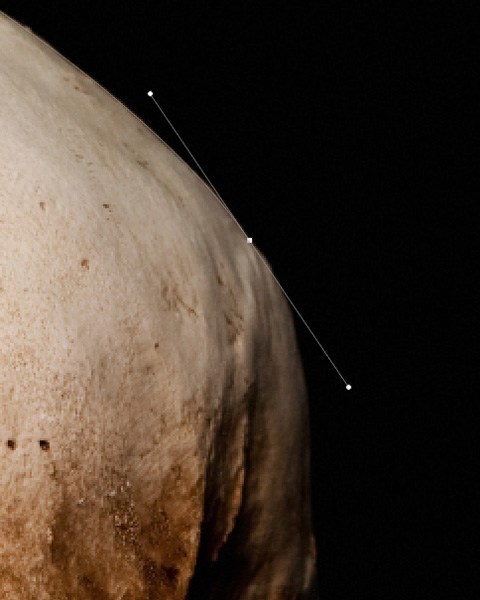
Continue to make your way around, following the contours of the skull as closely as possible.
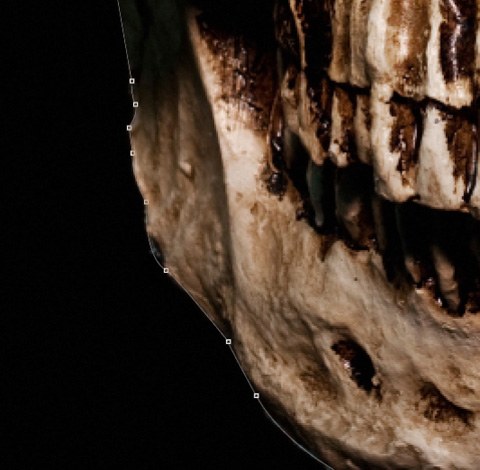
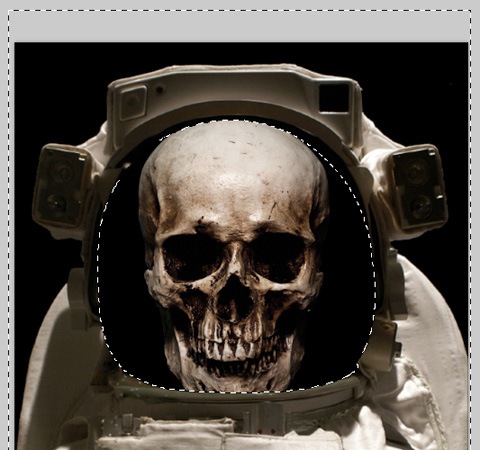
Once you have made your way around the entire shape, close your path to complete the outline. Control-click/right-click anywhere along your path to reveal a dropdown menu. From this menu, we want to choose Make Selection.
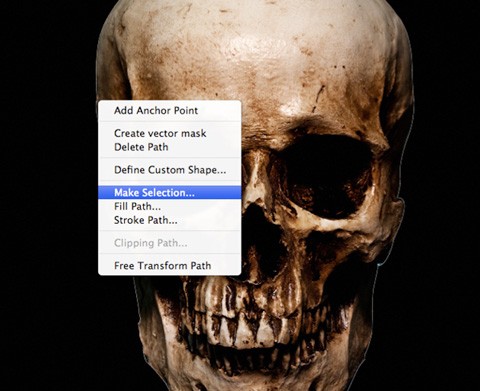
You should then see the marching ants that indicate your active selection. From here, press Cmd/Ctrl + J to duplicate your selection onto a new layer just above the original layer. If you turn off the visibility of the original layer, you should now see a transparent background.
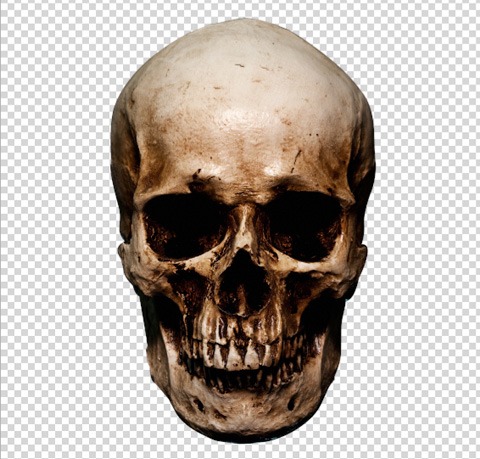
Save this image (Cmd/Ctrl + S) some place safe, as we will be using it after we prepare the next photo.
Step 2: Isolating the Space Suit
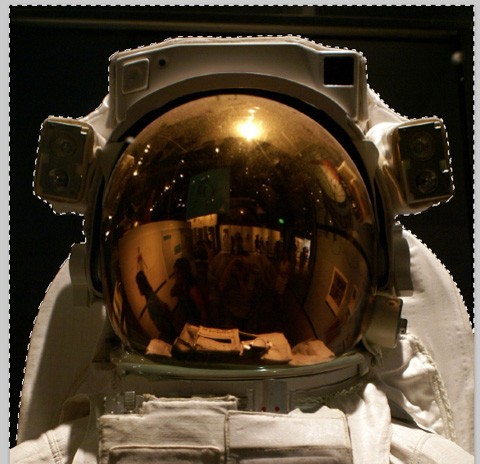
Now we will need to download and open the image of the Spacesuit Close-Up. We will need to remove the background from this image as well, but we can do this using a slightly easier technique.Select your Magic Wand Tool (W) and set the Tolerance option in the Options Bar to about 32, which will give us a pretty clean selection around our edges.
Click your mouse somewhere in the background to select the dark background color. If any part of the background is not selected on your first try, simply hold down Shift and click in those areas to add them to the existing selection. Then invert the selection by going to Select > Inverse.
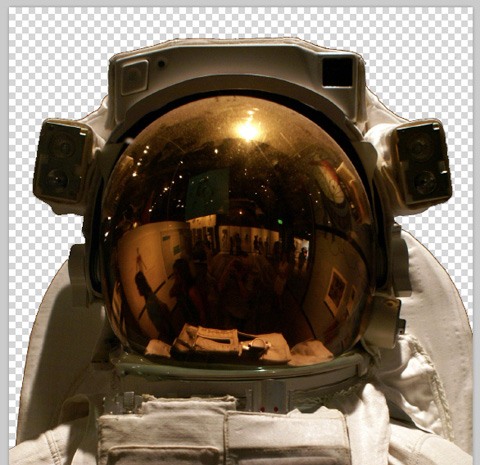
Once again, with your selection active, press Cmd/Ctrl + J to duplicate the selection onto a new layer. You should now have the isolated space suit that we will be using in our image. Save this with the isolated skull before moving on.
Step 3: Destroy and Rebuild
With both of our main images prepped and ready to go, we will now make a new Photoshop document that is 8.5" x 11" (Standard Paper Size). We also want to set the Resolution to 300dpi.Double-click on the default Background layer to unlock it, and fill it with black using the Paint Bucket Tool (G). What we want to do next is import the isolated space suit image that we prepared in the previous step. Press Cmd/Ctrl + T to activate Free Transform and hold down Shift while dragging outwards from any of the four corners to scale it up while constraining the proportions of the image.
Make the image large enough so that it fills most of the canvas, leaving a bit of room at the top. It’s okay if we crop out some of the bottom. You should have something like this:
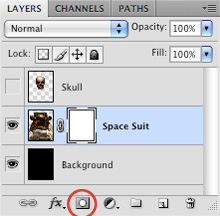
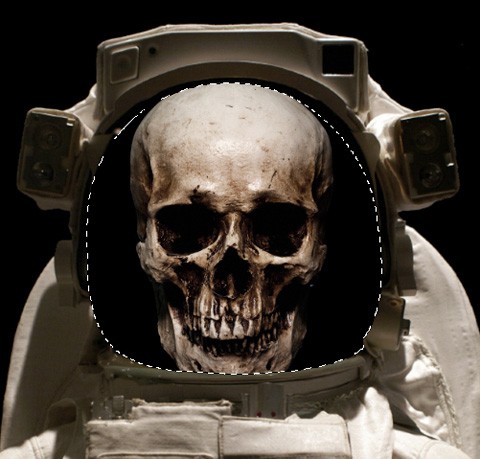
Next, import the image of the isolated skull and make sure that this layer is at the top of the Layers Panel, above the background and the isolated space suit. You will also have to scale this image up using Free Transform. Try to match it to the image shown below:
It’s okay if the skull is a bit taller than the visor of the helmet because we want the jaw to extend just a bit past the lower portion of the glass. This is how your Layers Panel should be looking at the moment:

Once you have done that, turn the visibility of the skull layer off so you just see the suit and the background. We will be coming back to this shortly.
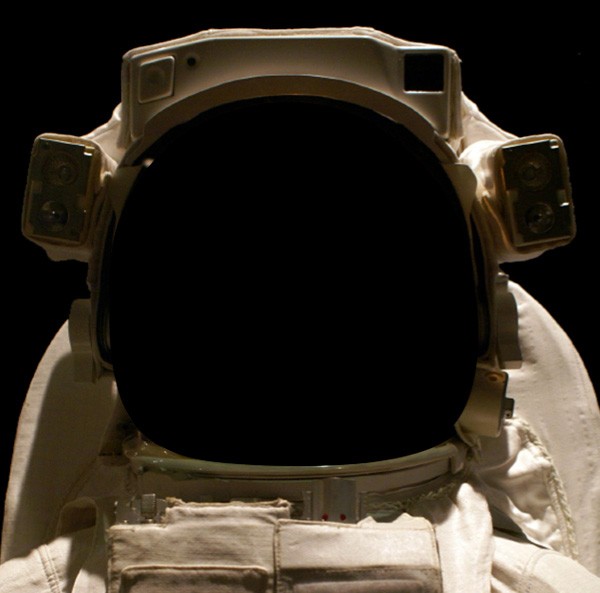
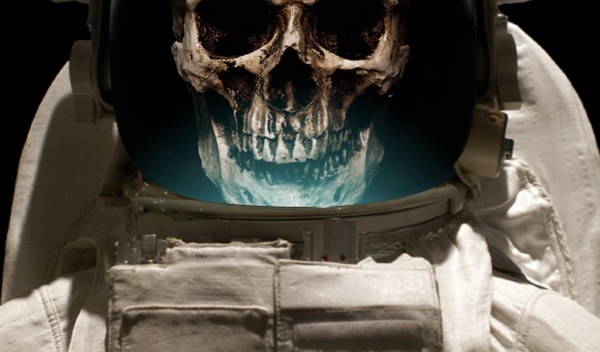
Step 4: Masking the Mask
With our skull layer now turned off, we have a clear view of the visor on the helmet of the space suit. What we want to do here is add a layer mask so that we can mask out the reflection that is showing in the glass.With the space suit layer highlighted, click on the Add layer mask icon at the bottom of the Layers Panel.
Switch over to your Brush Tool (B) and, with a solid black color selected as your Foreground color, choose a hard, round brush.
Begin to paint into the layer mask using this brush in order to mask out the glass visor. We will be creating our own to add above the skull layer a bit later. While doing this, you can quickly toggle the size of your brush by using the left bracket ([) and right bracket (]) bracket keys on your keyboard.
When working around the edges, it may be easier for you to use the Pen Tool (P) and create a path that you can then paint into on your layer mask (to get smoother edges).
Trace around the inside of the helmet using your Pen Tool (P) until you have completed the shape and closed the path. From here, Control-click/right-click anywhere along the path and then choose Make Selection to create a selection out of the path.
While the selection is still active, paint using your black brush into the layer mask in order to mask out the rest of the visor.
Step 5: Hue/Saturation Adjustment
Make sure the space suit layer is the active layer. Click on the small black/white icon along the bottom row of icons in the Layers Panel to reveal a menu of adjustment layers.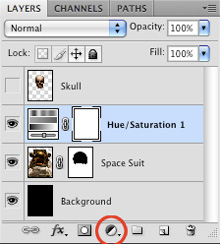
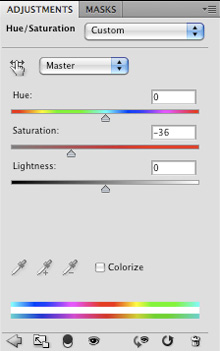
When the menu appears, choose Hue/Saturation; this will bring up the Hue/Saturation dialog window. Move the middle Saturation slider to the left to about -36; this will slightly desaturate the image of the suit. Keep in mind that this will desaturate anything below this layer.
Benefits of Adjustment Layers over Image Adjustment
There are a couple of advantages to using adjustment layers rather than applying an image adjustment directly to the layer. One of the most obvious is that when we apply an adjustment layer, you will always see a layer mask icon next to the adjustment in your Layers Panel. This gives us more control over the effect.In addition, when you apply an adjustment to an image directly, it can reduce the quality of the image, so by doing it this way, we can maintain the integrity of the original image.
Step 6: Moving the Skull Layer
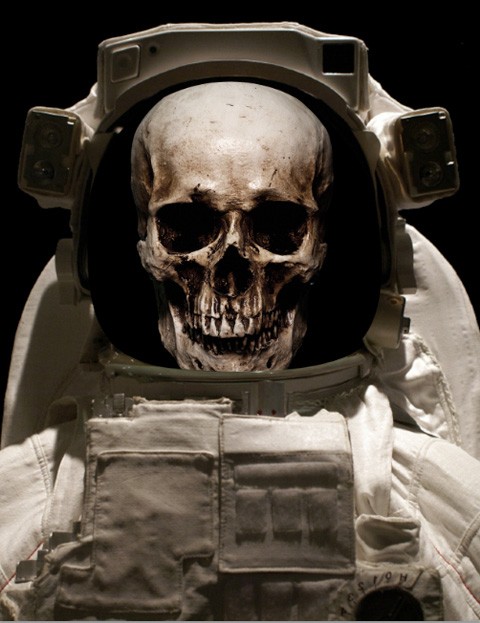
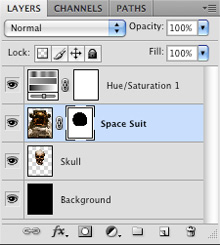
Now that we have cleaned up the visor and added our adjustment layer, we can turn the visibility of the skull layer back on. We are going to move it just below the space suit layer.
This will make it look like the skull is inside of the helmet rather than just floating on top of it. You will also notice that the Hue/Saturation Adjustment Layer affects the skull because it is now below this layer.
Step 7: Airbrushed Highlights
Next what we want to do is add some of our own highlights to the visor of the space helmet. We only want the highlights to be visible on the glass piece, which is what we masked out earlier. The layer mask on our space suit layer will come in handy for this next part.Cmd-click/Ctrl-click on the layer mask’s thumbnail image in the Layers Panel (it is the small thumbnail that has a slight border around the edges).
This will activate a selection around the visor that we masked out earlier. You will notice that our selection is currently everything outside of the visor.
We want to invert the selection, and we can do so by going to Select > Inverse (Shift + Cmd/Ctrl + I).

Now you will have a selection that you can work with.
While this selection is still active, create a new layer at the top of your Layers Panel and then switch to the Brush Tool (B). We want to use solid white for our Foreground color.
Use these settings for your brush:
On the new layer, begin to paint with your brush just outside of the selected area so that you will just get the edges with white. Make a few passes for the part of the visor where you want to have the strongest highlight.
You can toggle back and forth with a soft brush and soft eraser to blend in the highlights and make them appear smoother.
After spending a few minutes getting the highlights in order, this is what I ended up with:
Step 8: Adding Some Color
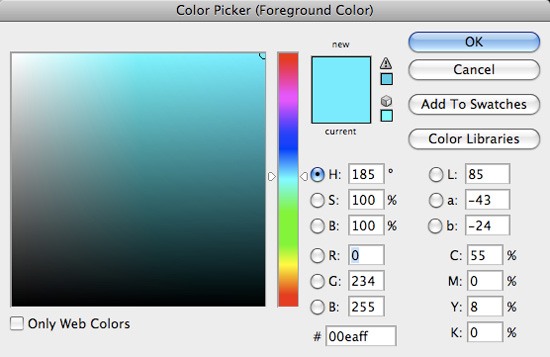
Create a new layer just above your black Background layer and switch to your Gradient Tool (G). Choose the radial gradient option and set the gradient to fade from solid color to transparent in the Options Bar.For the color, we will be using a vibrant cyan color (#00EAFF).
Click and drag outwards on your new layer to apply the gradient and, afterwards, change its Blend Mode to Linear Dodge (Add).
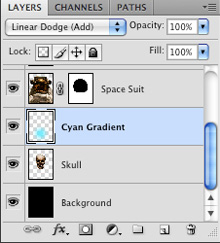
We want to place the gradient at the bottom of the skull, so that it’s just peeking out and coloring the bottom, underneath the space suit.
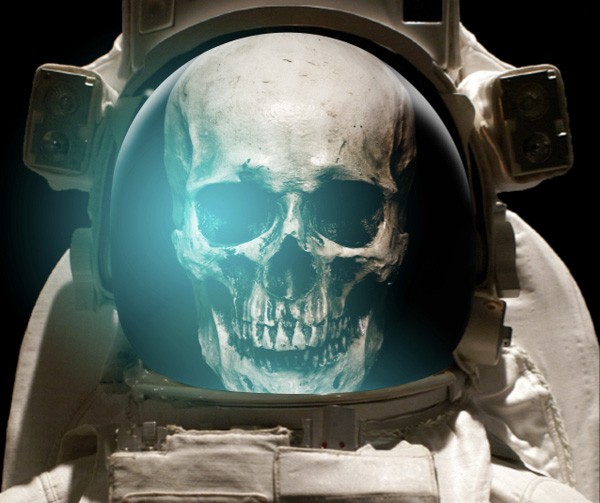
Duplicate the gradient layer by selecting it in the Layers Panel and then pressing Cmd/Ctrl + J. Move the duplicate layer directly above the skull layer.
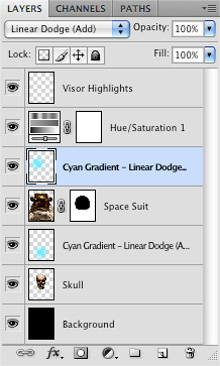
We want to move this layer so that it covers most of the left side of the skull.
Step 9: Adding More Color
Create a new layer and then choose a vibrant green color (#90FF00) for your Foreground color.
Using the same settings as before, we can create another radial gradient on this new layer. Set the Blend Mode of this layer to Linear Dodge (Add) as well. Place this layer just below the duplicate cyan gradient.

Move the gradient so that it’s coming from the top of the image and sort of centered on the skull and space helmet.
Step 10: More Color
Create a new layer and then choose a vibrant pink/red color (#FF003C).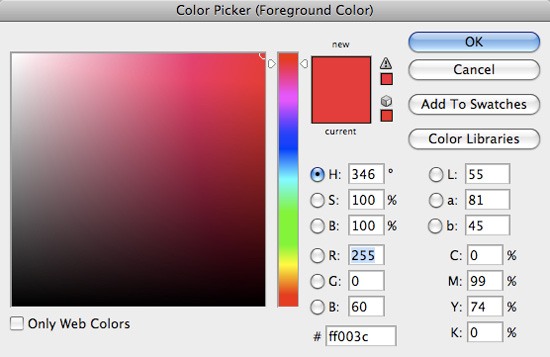
Create another radial gradient and place it just below the space suit layer.
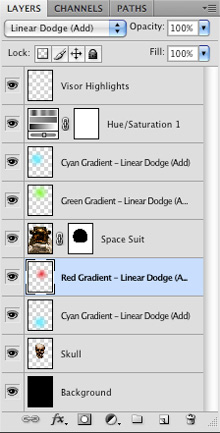
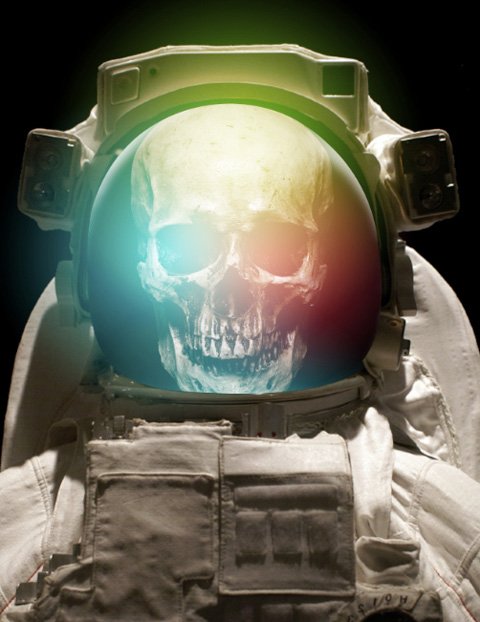
Play with the positioning of the gradients until you see something that feels right and that looks pretty smooth.
Step 11: Dealing with Dead Space
Download and open this Blue Space Nebula stock image and then place it into your Photoshop document. Make sure that this layer is placed at the very top of your Layers Panel. Scale it up so that it fills up the canvas. Change the Blend Mode of this layer to Overlay and reduce the layer Opacity to about 60%.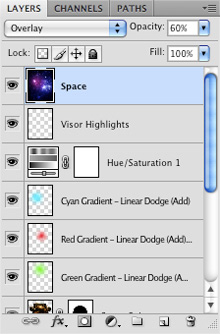
Doing this will add some additional lights and bits of color while also adding some contrast to the image so it doesn’t appear to be quite as light. It also adds a nice texture on different parts of the space suit and helmet.
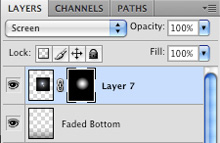
Step 12: Faded Edges
Create a new layer at the top of your Layers Panel and switch to your Gradient Tool (G). Select the Linear Gradient option and set it up so that fades from solid black to transparent in the Options Bar.On your new layer, click and drag upwards from the very bottom of the image to create a gradient. The idea is to fade the bottom out so it gets darker. Change the Blend Mode of this layer to Multiply and reduce the Opacity to 60%.
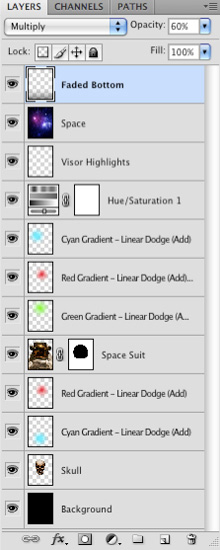
The result should look something like this:
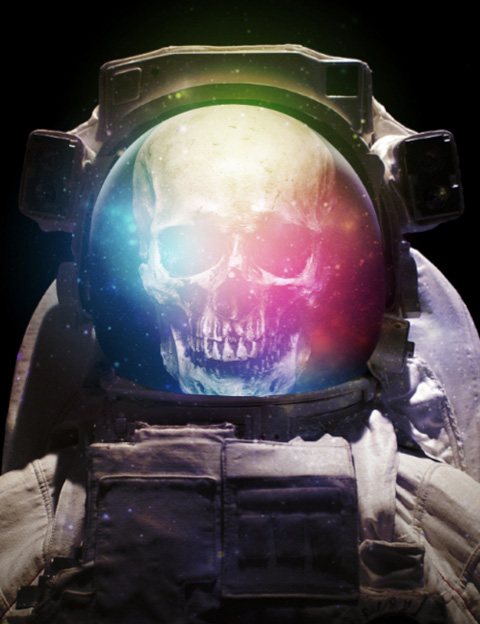
The reason we are doing this is that we don’t want the whole suit and the helmet to be in super high contrast. It creates more of a focal point for the design and also adds another interesting design element.
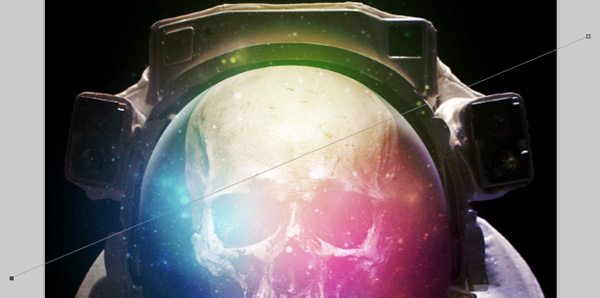
Step 13: Light Show
Create a new layer just above the background layer and then switch to your Brush Tool (B). Make sure you have about a 10px brush, and that you are using a hard edge.Next, switch to your Pen Tool (P) and make a straight line going through the image.
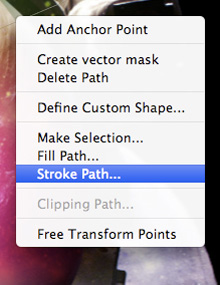
Control-click/right-click anywhere along the path to reveal a contextual menu, and then choose Stroke Path.
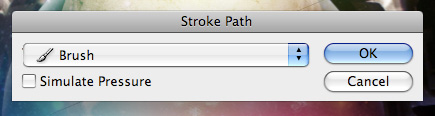
When the Stroke Path dialog window appears, make sure that the Simulate Pressure option is unchecked.
You will now see that the path has been stroked using the brush that we set up before we created our path.
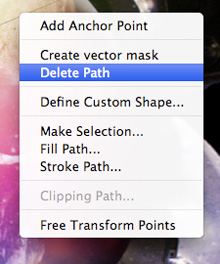
Control-click/right-click along the path once again and then choose Delete Path.
You should now have something like this:
Step 14: Glow Away
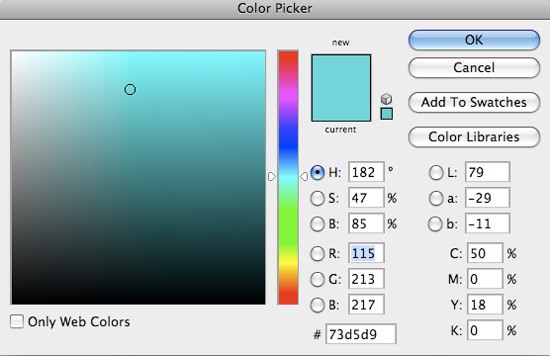
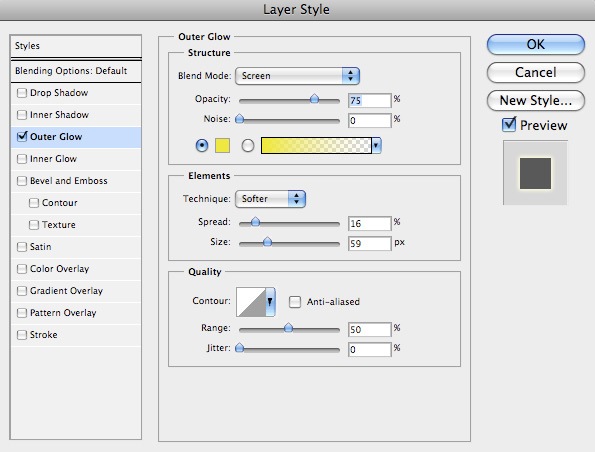
Double-click on the layer of the line that we just created to bring up the Layer Styles dialog window. Apply an Outer Glow layer effect with the settings shown here:
For the glow color, we want to use a vibrant blue (#73D5D9). Afterwards, simply press the OK button to apply the outer glow.
With the line layer still selected in the Layers Panel, press Cmd/Ctrl + J to duplicate it. Rotate the duplicate layer slightly using Free Transform (Cmd/Ctrl + T) so that it intersects with the other line.
Double-click on the duplicate line layer in the Layers Panel to bring up the Layer Styles dialog window, and then change the outer glow color to a vibrant yellow color (#EFE836). Press OK to apply the change.
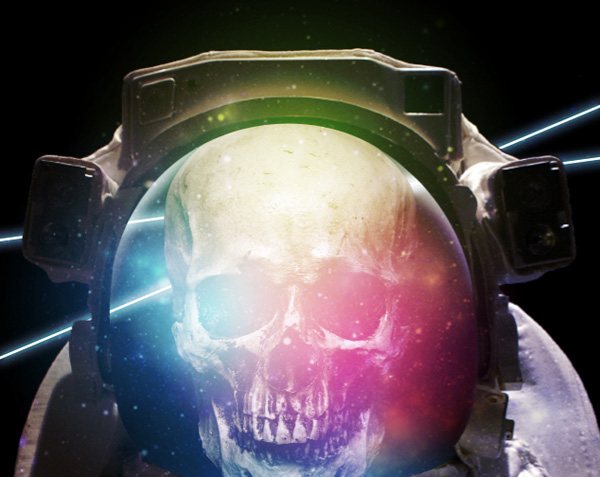
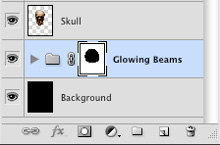
Step 15: Glowing Beams
Repeat the previous step by duplicating the lines and changing the color of the Outer Glow layer effect. Here I have picked some colors from our image including magenta and green, but feel free to experiment with the colors and the positioning of the glowing beams.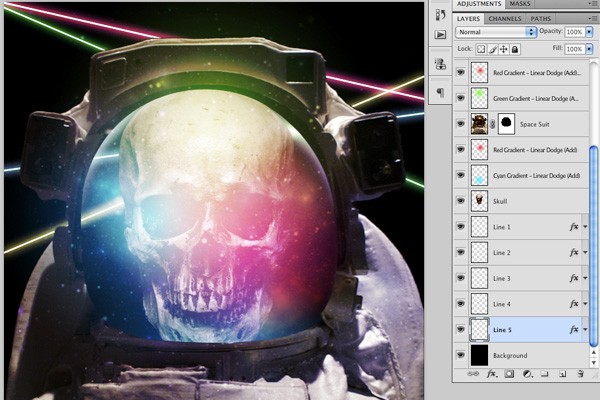
Step 16: Organize Your Work
Click on the top line layer in your Layers Panel, hold down Shift, and then click on the bottom line layer to select them all at once.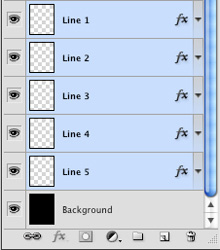
Next, press Cmd/Ctrl + G to put all of these layers into a layer group. Name this group what you like.
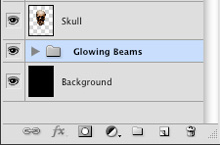
This will make our document easier to work with.
Step 17: Can’t See Me!
Click on the layer group we just created in the Layers Panel just to make sure it is the active layer. Next, click on the Add layer mask icon at the bottom of the Layers Panel.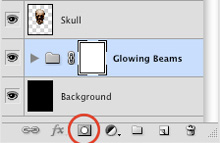
Once you have applied the mask — the layer group should still be the active layer at this point — Command-click/right-click on the space suit layer mask’s thumbnail image to load a selection.

Go to Select > Inverse to invert the selection so that you can remove the beams running through the visor of the helmet. This is behind the astronaut, so we wouldn’t be seeing these lines.
Paint into the mask using a solid black brush at 100% opacity to remove all of the beams from the helmet.
Step 18: Adding Texture
Load up the Nasa Space Brushes. Create a new layer just above the space suit layer. Choose the seventh brush from the brush library.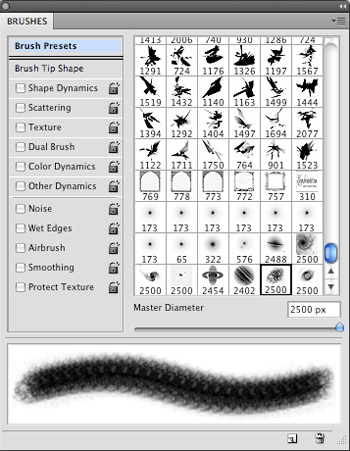
Paint using a solid white color and just create one large shape in the middle of the image. Change the Blend Mode of this layer to Overlay.
Then we want to apply a layer mask as we have done before to mask out the parts of the brush that overlap the visor of the helmet.
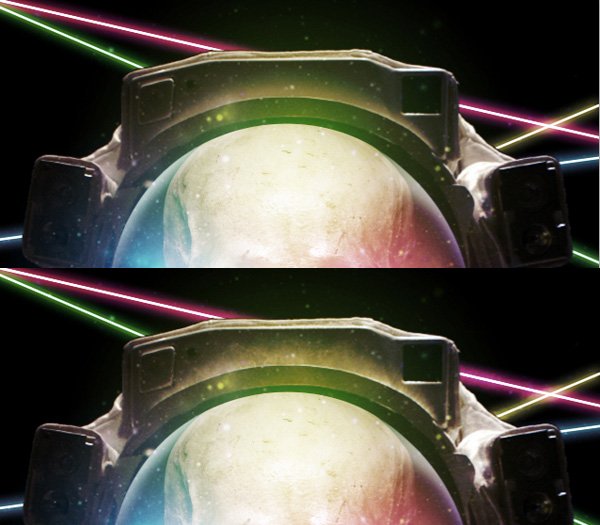
The following image shows the before and after. Notice the tan part of the suit just above the visor and how it adds a nice organic texture to the form.
Step 19: Baby Got Back…ground
Duplicate the space image we used earlier by selecting it and then pressing Cmd/Ctrl + J. Bring this duplicate layer down the layer stack so that it’s just above the Background layer.Next, change the Blend Mode of the layer to Screen and then reduce the Opacity of the layer to 60%.
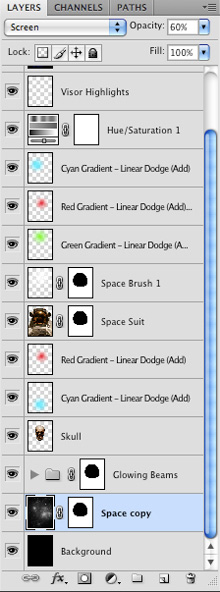
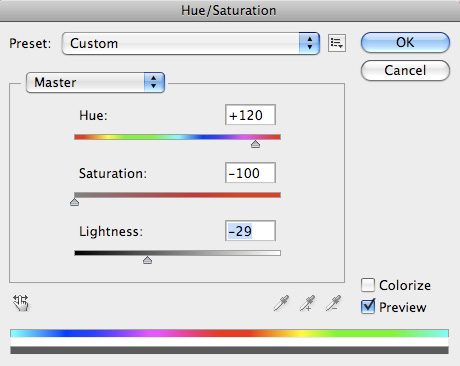
Go to Image > Adjustments > Hue/Saturation and use the settings below.
Create a layer mask on this layer, and then remove any part of the image that is over the helmet visor. We already have enough texture in this area and so we only want to show what is in the background.
Step 20: Colorful Galaxy
Create a few more layers above the background space layer where you can place a few colored radial gradient layers like those that we did earlier on in the tutorial. Sample colors from the helmet and play with the positioning of the gradients. Each one should be on its own layer. Change the Blend Mode of each radial gradient layer to Screen.Command-click/right-click on the layer mask’s thumbnail image on the space suit layer to activate the selection of the visor. Mask out most of the background colors that go into this area.
You should now have something like this:
Step 21: Ric Flare
Next, create a new layer at the top of your Layers Panel and switch to the Rectangular Marquee Tool (M). Create a large square marquee selection and then fill it (Edit > Fill or press Shift + F5) with black.Afterwards, go to Filter > Render > Lens Flare.
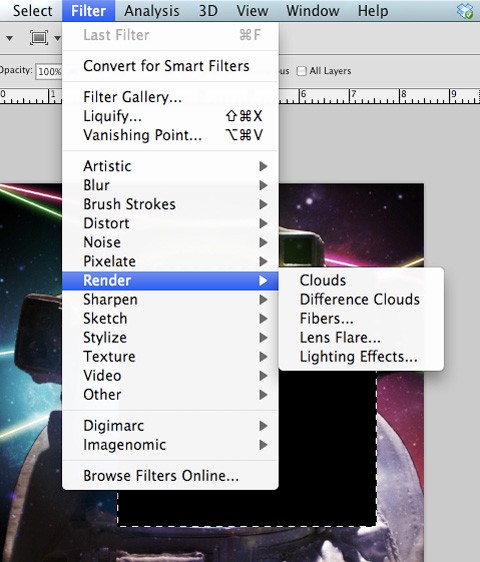
Apply the settings shown below.

Press OK to apply the Lens Flare filter. Change the Blend Mode of this layer to Screen.
Switch to your Gradient Tool (G), select the Radial Gradient option and make the gradient fade from white to black.
We want to get rid of the edges of our flare. Click on the Add layer mask icon at the bottom of the Layers Panel to create a layer mask on the layer. Click in the center of the flare (which is the brightest point) and then drag outwards to apply the radial gradient fade, which should leave the center intact.
Once you have applied the mask, make sure that you have your flare layer selected, not its layer mask. Then go to Filter > Blur > Gaussian Blur. Use a blur Radius of about 4-6px.
You can move the flare on the upper right part of the helmet using the Move Tool (V), if you wish.

Step 22: Drop the Shadow
Now we will be adding a shadow behind the space suit so what we want to do is double-click on the space suit layer to bring up the Layer Styles dialog window. When that appears, add the Drop Shadow layer effect, and then use the following settings for it: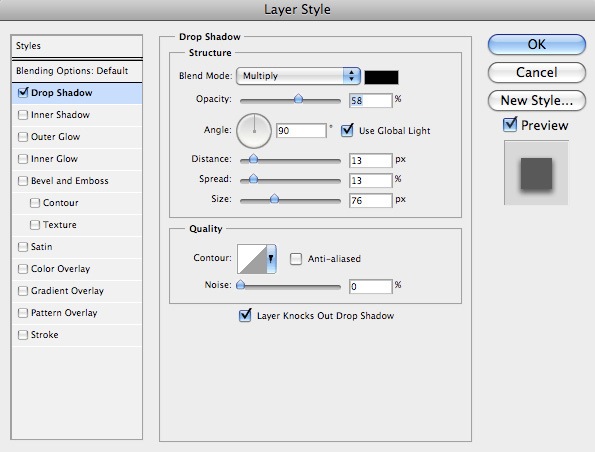
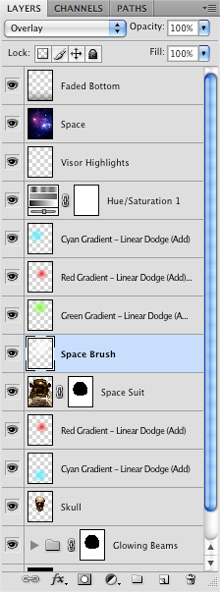
Step 23: Bringing It All Together
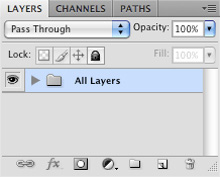
Select all the layers in the Layers Panel.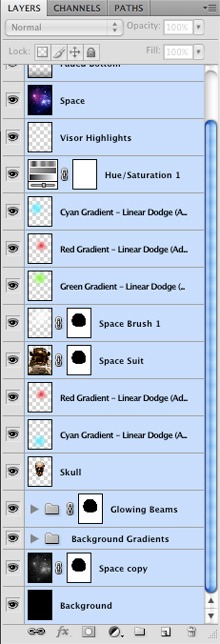
Press Cmd/Ctrl + G to place all of these layers into a layer group and name it something like All Layers or anything else that you like.
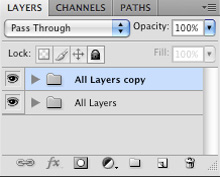
Drag the entire layer group down to the Create a new layer icon at the bottom of the Layers Panel to duplicate the group.
Control-click/right-click on the duplicate layer group and then choose Merge Group.
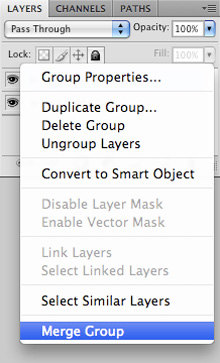
This will flatten the entire layer group into a single layer, just above the original folder. Once you have merged the group, turn off the visibility of the original folder.

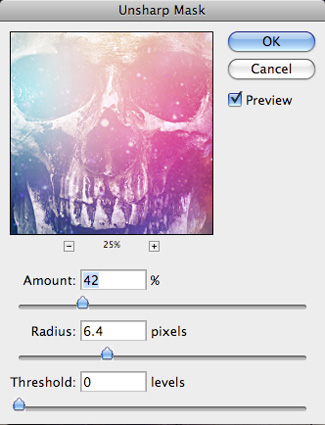
Step 24: Unsharp Mask
With your flattened layer selected, go to Filter > Sharpen > Unsharp Mask.
Apply the following settings to sharpen the overall image:
Step 25: Finishing Touch
As a finishing touch, I just want to add a title to the piece. This part is subjective and completely up to you, but I feel that it adds something extra to the design.
Once you have done that, save your work and enjoy the results!
Tutorial Summary
In this tutorial, we did a lot of stuff. We used radial gradients to add colorful light effects to our work, we relied heavily on layer masks to make non-destructive (reversible) edits, harmoniously brought together disparate design elements using adjustment layers and image adjustments, and more.Thanks for following along — see you next time!


0 nhận xét:
Đăng nhận xét