Step 1
Start by creating a file in Photoshop at the size of an A4 (210mm x
297mm) at 300 dpi. Once created, fill the background with a dark gray (#
424242)
Step 2
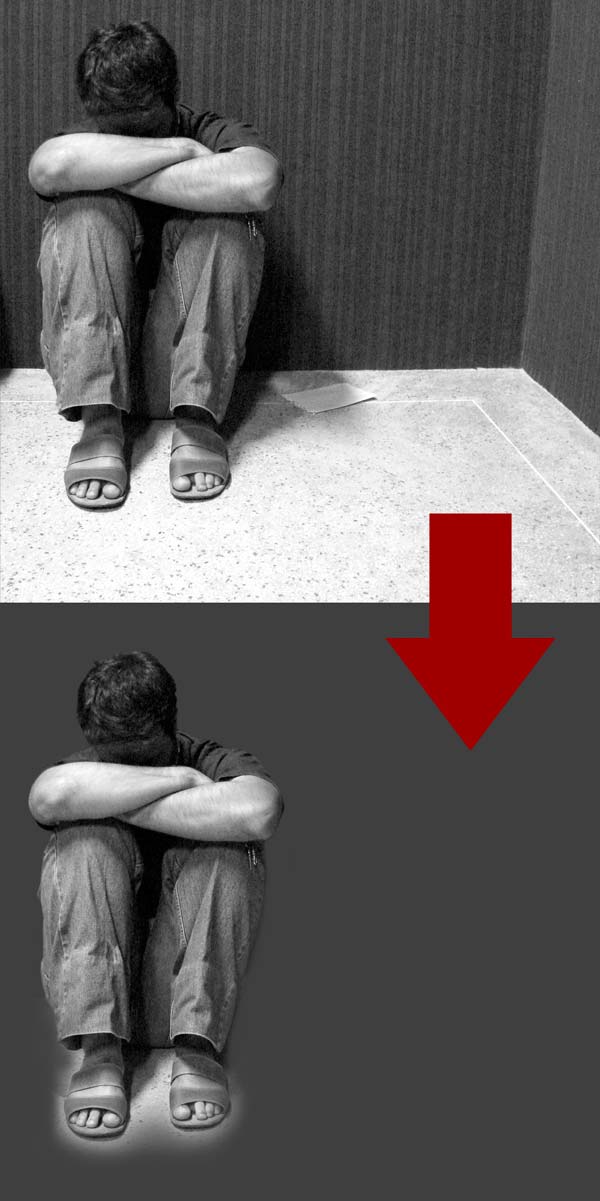
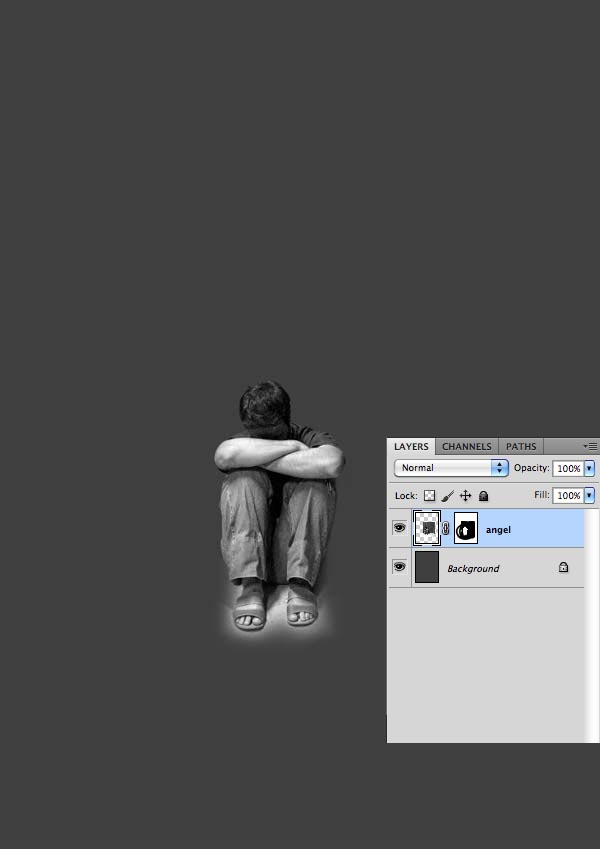
After creating the background, the first thing to do is extract the
boy by using your favorite tool. I made a selection using the Polygonal
Lasso Tool (L) and then applied a mask. No need to be very precise on
this selection, because the boy will merge with the rest of the image.
In the area of the feet you can leave some details such as the shadow
between her legs, and remove the excess using a soft brush (B).
Step 3
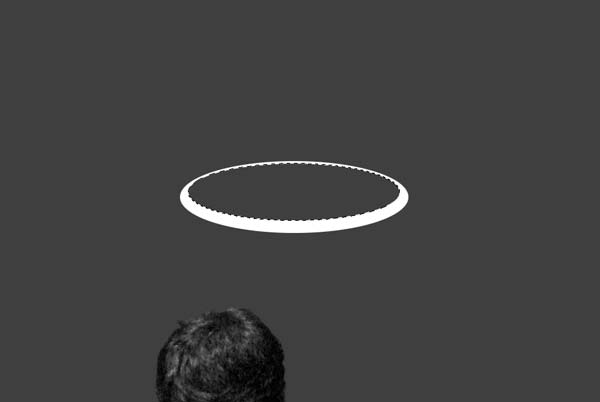
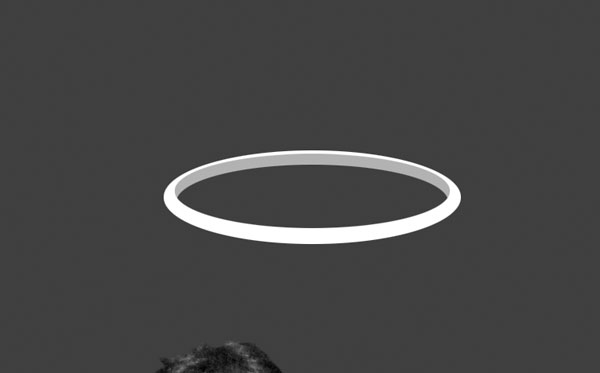
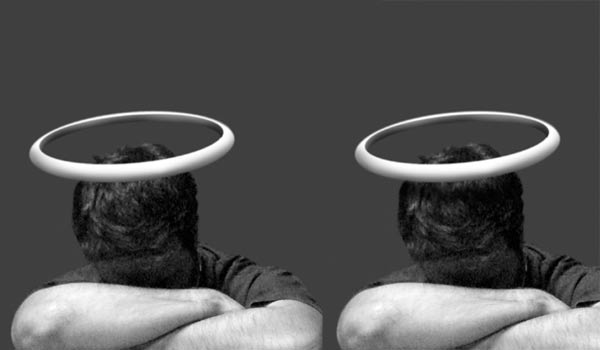
Now let’s create an aureole for the angel. Create a layer called
aureole and with the Elliptical Marquee Tool (M) make an oval selection
and fill with white.
Make another selection within the aureole and delete the selection. This way you will get something like that.
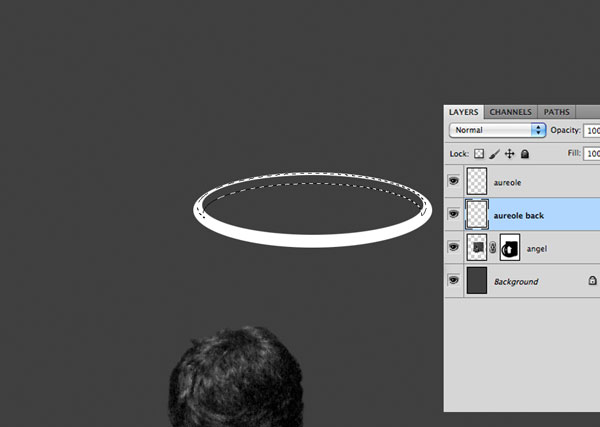
Now we need to create the inner of the aureole. Create a new layer,
place it below the aureole layer and name it "aureole back. Make an oval
selection and fill with a light gray (# b0b0b0).
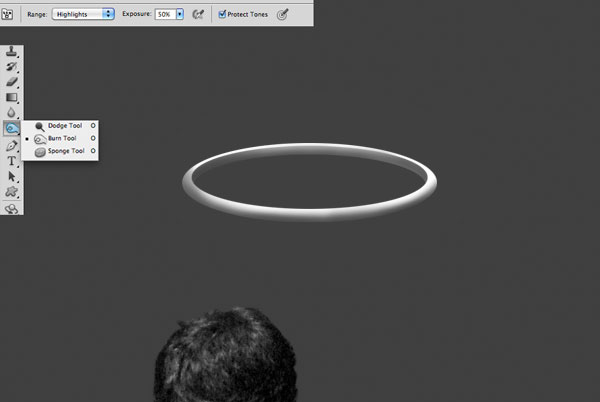
Use the Burn Tool (O) in Highlights mode to create the lights and
shadows of the halo. In the end you should have something like the image
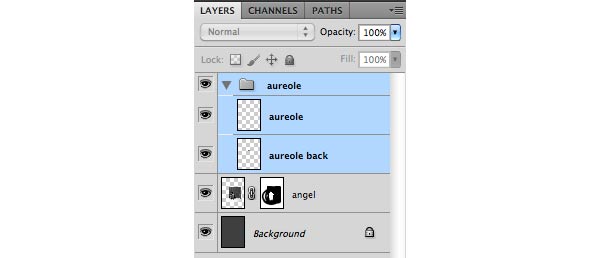
below. After that, group the two layers of the aureole to keep your
file organized.
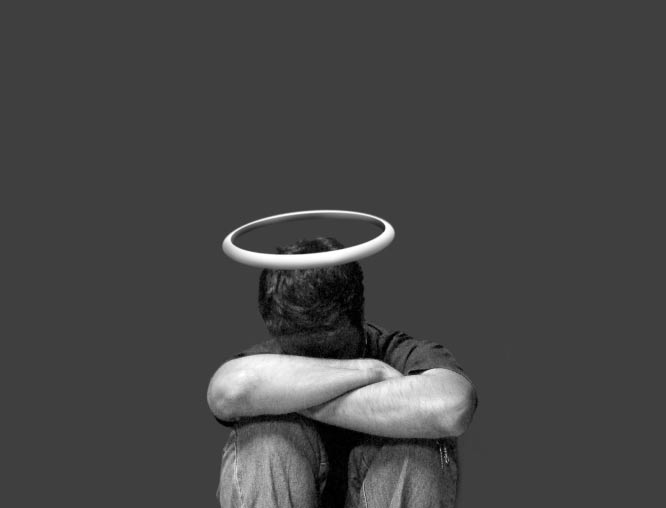
Position the halo over his head.
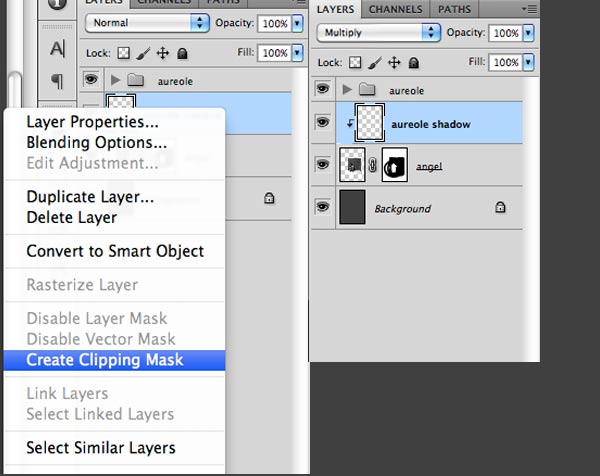
Now we need to make the shadow of the halo. Create a layer and
position it above the layer "angel." Right click on the layer and create
a "Clipping Mask." Set the blend mode "Multiply" and with a Soft Brush
(B) paint the angel’s head trying to simulate a shadow.
Step 4
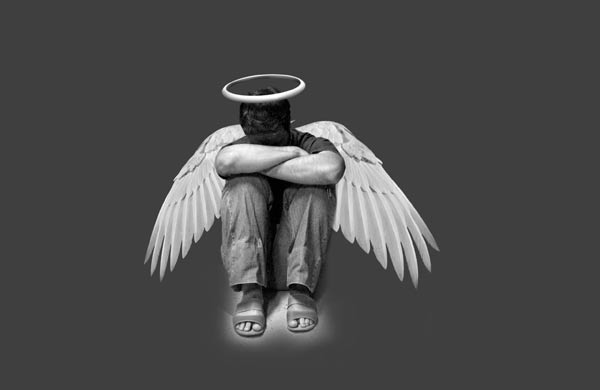
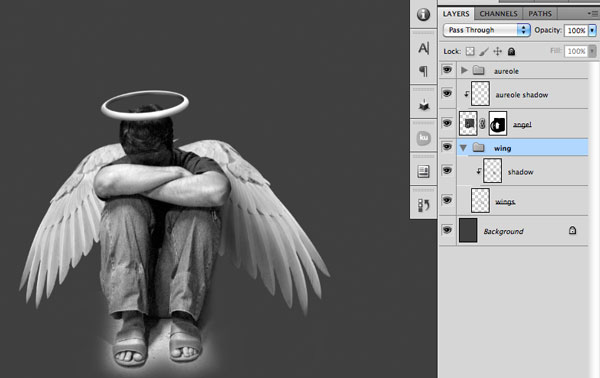
Open the image of the wing, cut and place them behind the angel.
Create a New Layer, set it to "Multiply" and then create a "Clipping
Mask". Use a Soft Brush (B) with Black and paint over the wing to create
the shadow of the boy. Don’t forget to group the "Wings" layer and the
"Shadow" layer.
Step 5
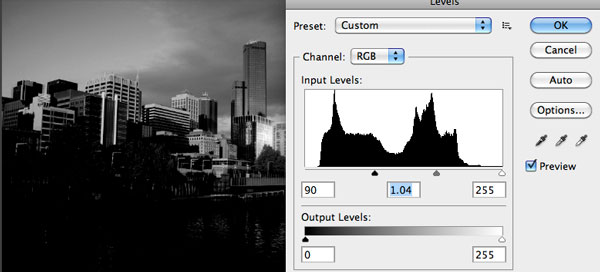
Open the city file, desaturate it using Command/Ctrl + Shift + U.
Then go to Image > Adjustments > Levels to darken the image.
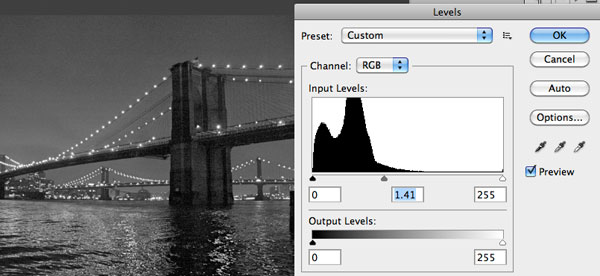
Now open the bridge file, then go to Image > Adjustments > Levels to brighten the image.
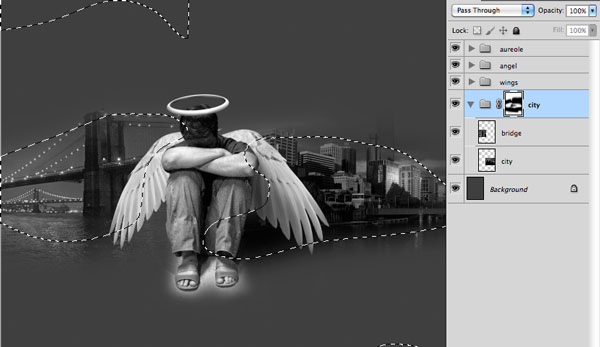
After that, position the bridge behind the angel and the city like
the image below. Group the two layers and create a mask to hide in the
image edges.
Step 6
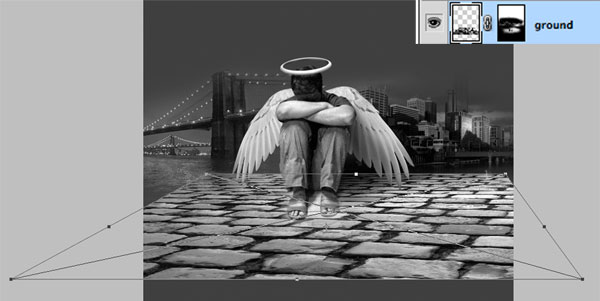
Now it’s time to set the ground. Take the image ground and desaturate
it. Place the ground like the image below and use a layer mask to hide
the edges.
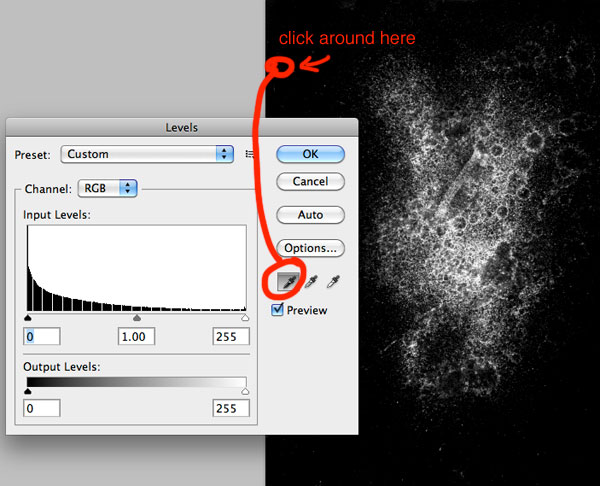
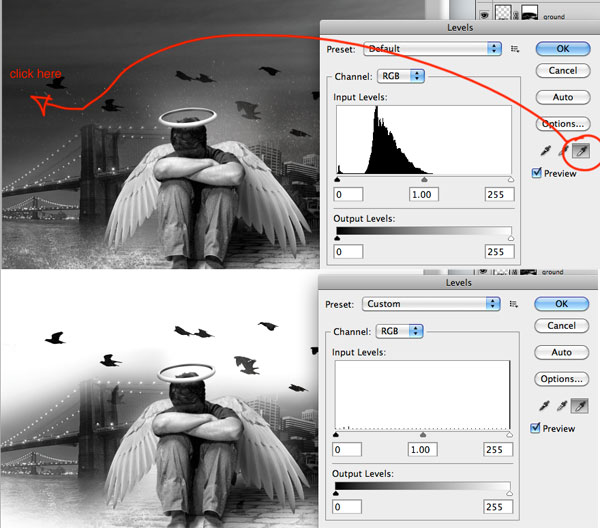
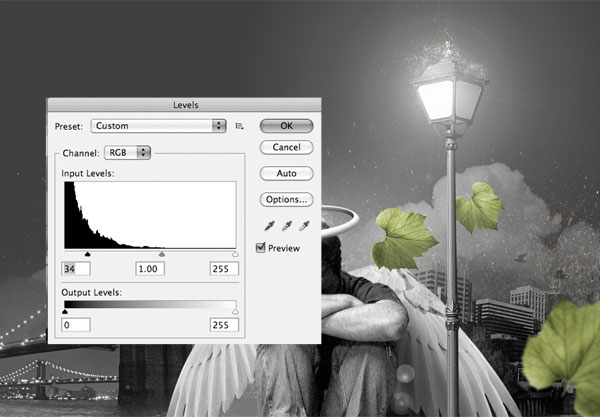
Open the Spatter image and desaturate it using Command/Ctrl + Shift +
U. Invert the image color with Command/Ctrl + I. Then go to Image >
Adjustments > Levels. At the levels window click at the black
eyedropper and click in the black area as shown in the image.
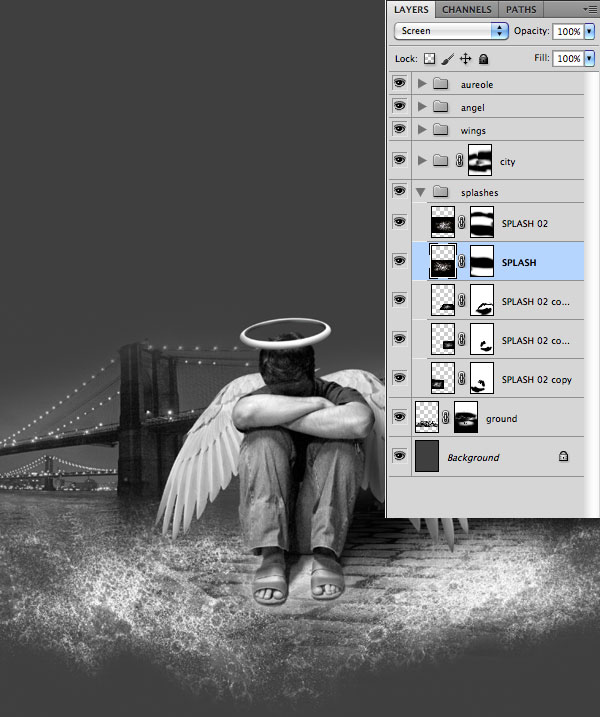
After that, copy and paste the spatter in your main file. Set the
blend mode to "Screen" so the black will become invisible. Then hide the
borders using a Mask or the Eraser Tool (E). Make other copies of the
Spatter layer and position them to get the result below.
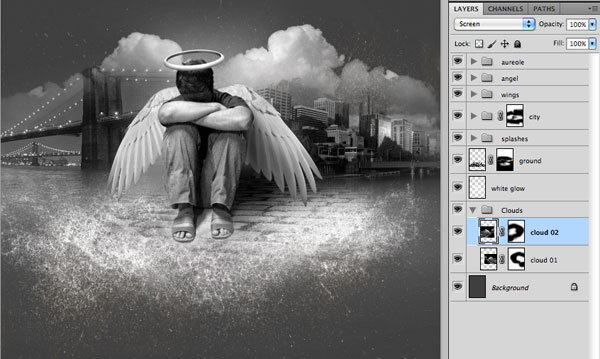
Step 7
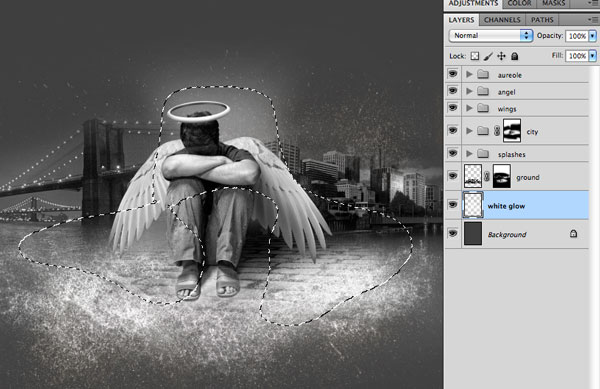
Now let’s put more details in the Background. Create a New Layer on
the top of the Background and use a Soft Brush (B) to make a soft white
glow.
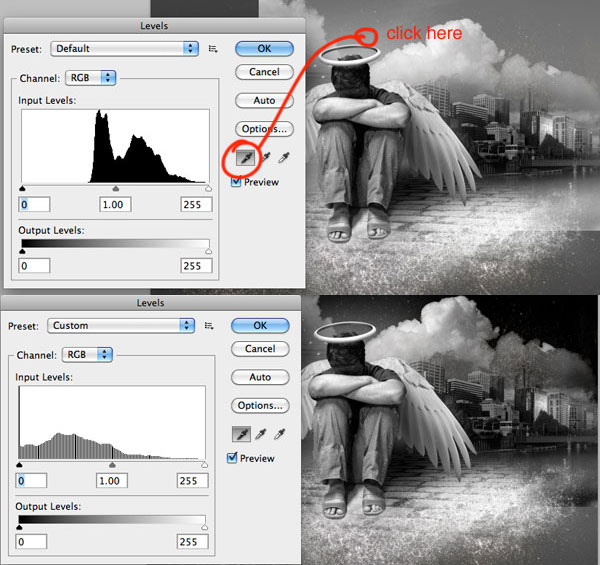
Place the Clouds on top of the Background layer, then desaturate it
using the Command/Ctrl + Shift + U. Go to Image > Adjustments >
Levels and use the Black Eyedropper to set the black point in the image
as shown below. After that set the Blend Mode to Screen.
Duplicate the Cloud Layer and Flip it Horizontally and then place it
like in the next image. Group the Clouds Layers and set the Opacity to
50%.
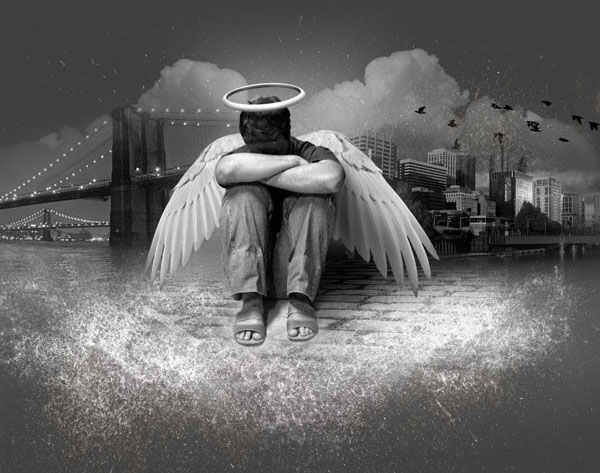
Step 8
Place the Birds image. Desaturate it using the same technique as
shown previously in this tutorial. Then go to Image > Adjustments
> Levels and use the White Eyedropper to set the White Point of the
image.
Set the Blend Mode to Multiply and position the image like in the next image.
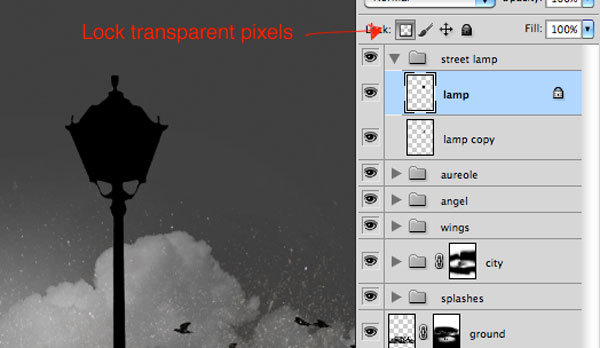
Step 9
Open the Street Lamp image and extract it from the background. Place
it into your main file on top of all layers. Now we are going to make
the shadow. Duplicate the lamp, set your foreground color to black and
fill the lamp copy locking transparent pixels.
Use the Free Transform – Command/Ctrl + T – to create the shadow of
the lamp. Set the Blend Mode to Overlay, opacity of 50% and put it
behind the lamp.
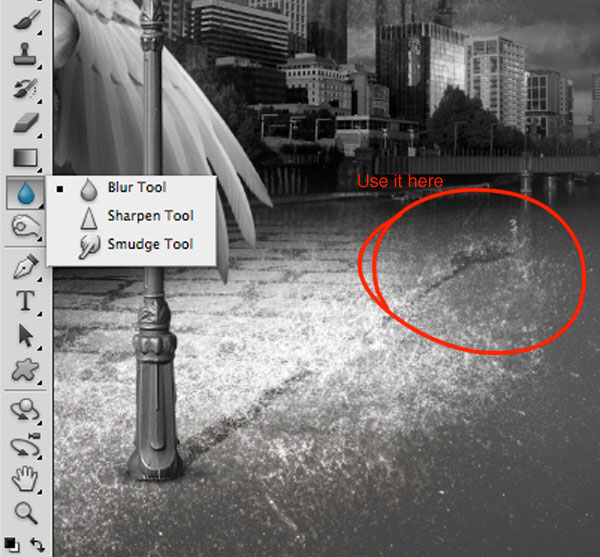
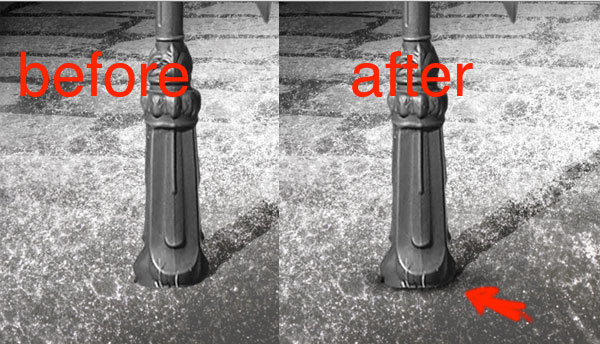
Uncheck the "Lock transparent pixels" of the shadow layer and use the "Blur Tool" at the end of the shadow.
Create a new layer and use a soft brush to make a small shadow underneath the lamp.
Step 10
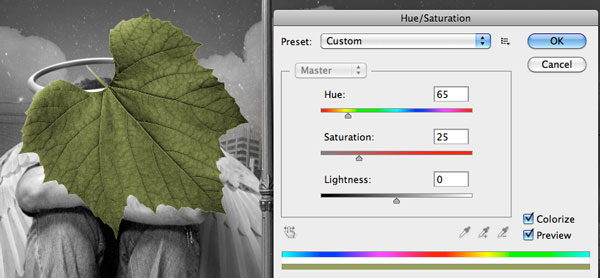
Now we have to add the "flying" leaves to the composition. Open the
Leaf image, extract it from the white background (I used Color Range)
and then go to Image > Adjustments > Hue/Saturation and use the
configuration below.
Duplicate the layer 3 times and place the other leaves around the
scene. Use the Dodge Tool (O) to make some areas of the leaves a little
brighter. Don’t forget the shadow of the leaf on the foot. To do that,
use the same process of the lamp shadow. After that, select the biggest
leaf and go to Filter > Blur > Gaussian Blur and use something
around 3.5 pixels. You’ll get the following result.
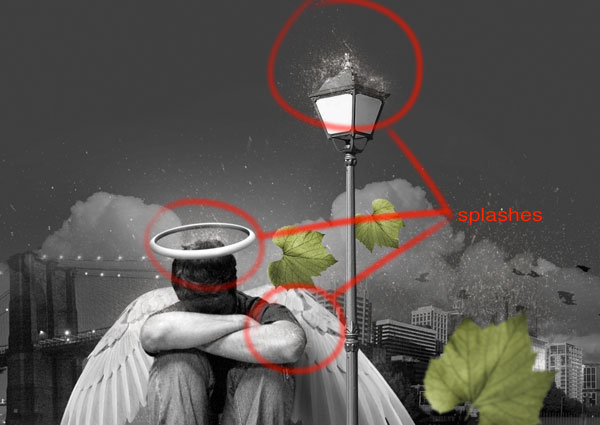
Step 11
Take the same splashes we’ve used on the ground and place them on the
top of the head and the lamp. In the future we will create a storm, so
they should look like water splashing from the rain that is falling.
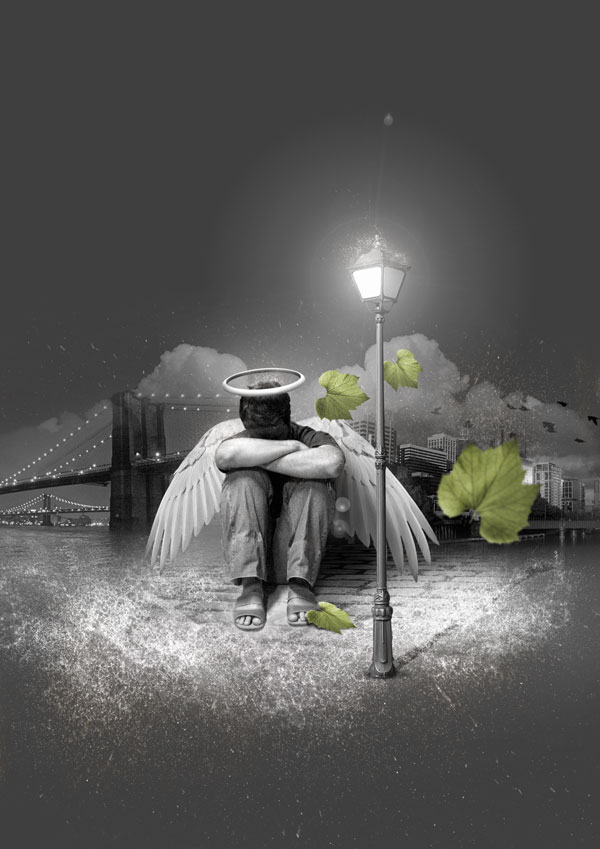
Step 12
Now we are going to add the lens flare effect to the lamp. Create a
new layer and fill it with black. Go to Filter > Render > Lens
Flare and use the following configuration.
Desaturate it and set the blend mode to Screen and opacity to 70%. Then use the levels to darken it a little bit.
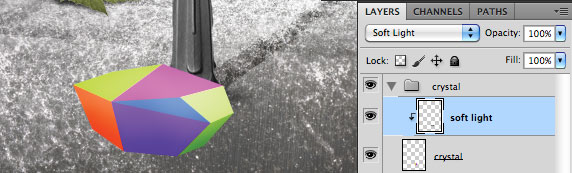
Step 13
Open Illustrator and create the colored crystal. After you’ve
created it, copy and paste into Photoshop. Create a new layer and set
the blending mode to Soft Light and click with the right button to
create a Clipping Mask. Use a Soft Brush (B) with Black (to darken) or
White (to brighten) in some areas of the crystal. This technique is very
useful if you do not like to use the Dodge and Burn, because this way
you can correct mistakes whenever you want. It gives you much more
flexibility.
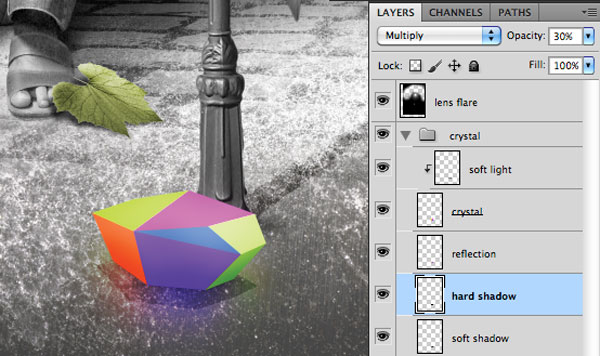
Duplicate the crystal layer to make the reflection and put it under
the original crystal. Set the blending mode to Linear Dodge, change the
opacity to 50%, apply Filter > Blur > Gaussian Blur and use a
radius of 35 pixels. After that create a Hard Shadow (Multiply and
opacity of 30%) and a Soft Shadow (Multiply and opacity of 80%) under
the crystal.
Step 14
To create the rain, take a look at Step 13 of this
tutorial. You should get a result similar to below.
Step 15
Create a new layer and fill it with black. Go to Filter > Render
> Difference Clouds. Set the blend mode to screen and use a mask to
hide some areas of the fog we’ve just created. You can add more fog if
you want, this is up to you.
Step 16
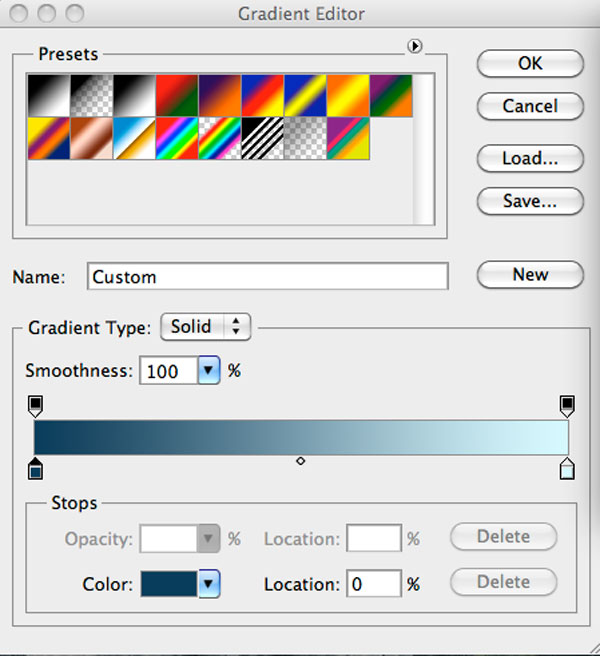
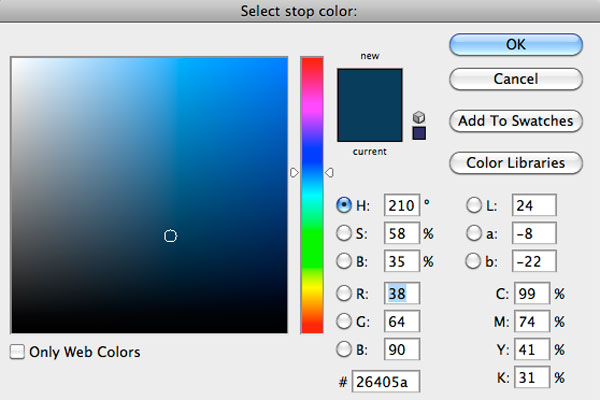
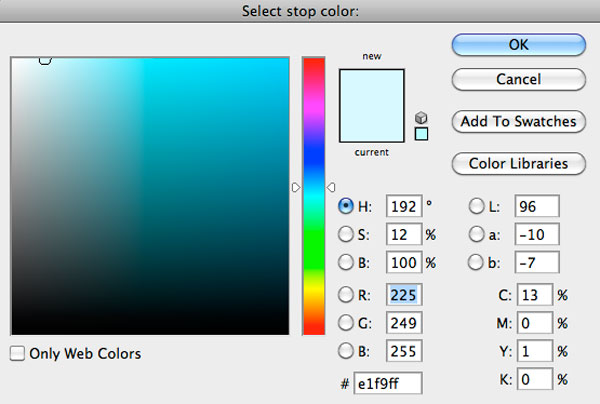
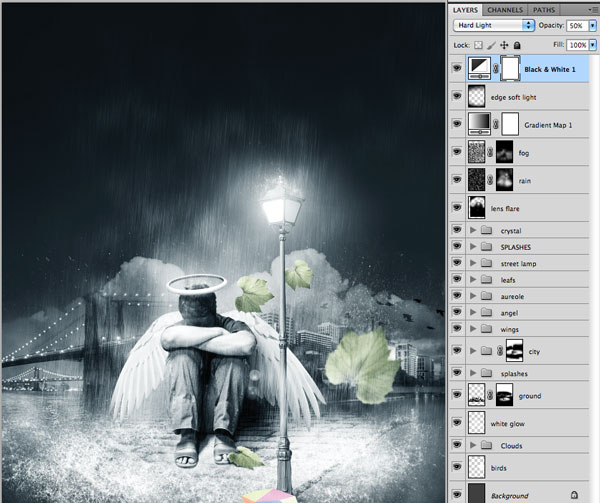
Here we’ll add the final details. First create an Adjustment Layer
(Layer > New Adjustment Layer > Gradient Map.). Use the following
configurations and set its blending mode to Soft Light.
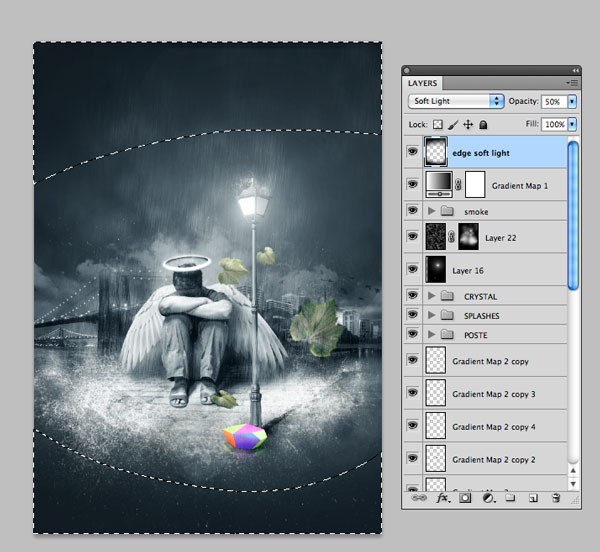
Now create a new layer, set the blending mode to Soft Light, the
opacity to 50% and paint with a large Soft Brush around the edges.
Add a new Black & White Adjustment Layer (Layer > New
Adjustment Layer > Black & White) and set its blending mode to
Hard Light and the opacity to 50%.
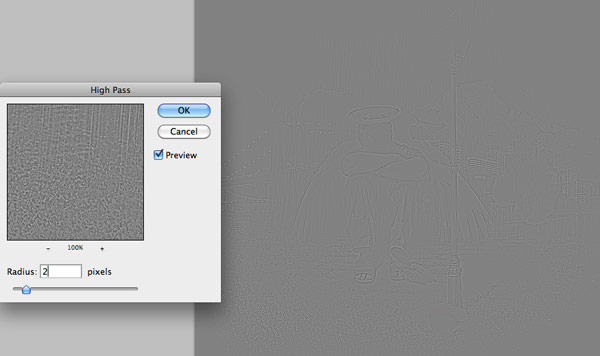
Create a new merged copy of your image using Command/Ctrl + Shift +
A, Command/Ctrl + C and Command/Ctrl +V. Go to Filter > Others >
High Pass and use the configuration below. After that set the blending
mode to Hard Light. This effect will sharpen the image. Now you’re done!
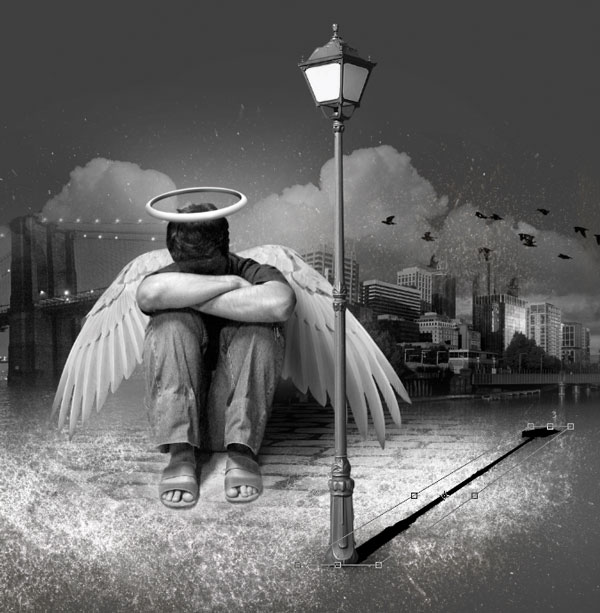
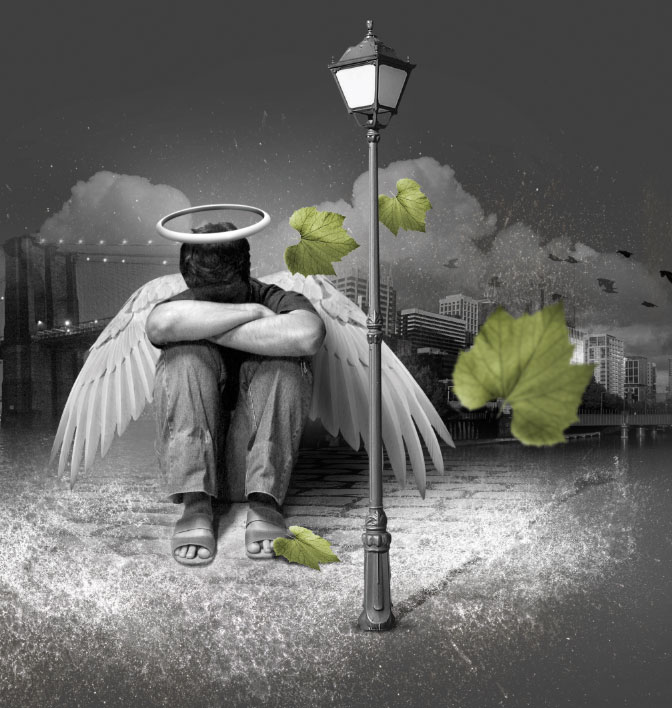
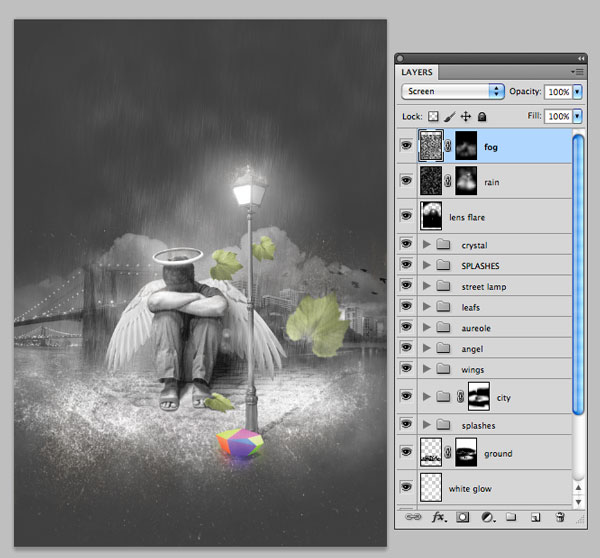
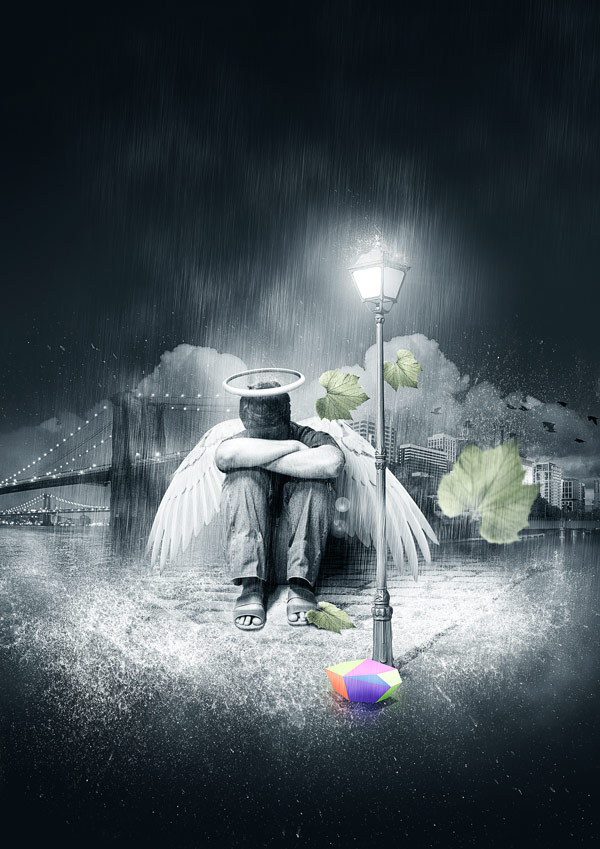
Final Image
Here is the final result. Hope you have enjoyed the tutorial and learned something new.


0 nhận xét:
Đăng nhận xét